Tuesday, April 17, 2012

I Don't Have Time to Freezer Cook...Freezer Cooking

Time for some freezer cooking....life seems incredibly busy.  Just this past weekend, I had to have all 3 girls somewhere within an hour of each other only to have to start the pickup process 2 hours later.  I LITERALLY had an hour here, an hour there, to freezer cook.  But I managed to get several meals in the freezer in just 4 hours (all split up over the course of my day.)  I had three days of that craziness, and I am sure there are LOTS of you who can totally relate.

My Menu:
Main Dishes:
  • Garlic Parmesan Chicken- Yummy Recipe Here!  I made 3 recipes of this one.  It is our family's FAVORITE chicken, even my "particular" eater eats this!

    
    Baked Chicken Nuggets ready for the freezer
  • Baked Chicken Nuggets- Nugget Recipe Here!  I love to have these for quick lunches or for dinners I know the girls won't eat. (Why waste good food if I can give them a healthy option???) 

  • OMGoodness! Chicken - This  one is a new one for me that I found on Pinterest, but I made it slightly different...so here is the SIMPLE recipe...
      • Just mix 1/2 cup sour cream or yogurt- I used fat free Greek Yogurt, and 1/2 cup Parmesan cheese. Spread over chicken breast in a baking dish.  Cover with foil and freeze.  When ready to serve:  Thaw. Sprinkle Italian bread crumbs on top and bake for 30-40 minutes at 350 degrees. I plan on uncovering it the last few minutes of baking.  It is supposed to be amazing- I hope so, because I made 2 pans of it.
      • (UPDATE: My family loved this and have requested it again when I freezer cook next!)

  • Chicken and Cheese Weight Watchers Casserole- WW Chic and Cheese Casserole  This one is not a "freezer" recipe, but here is how I adapted it:  Cook macaroni TWO minutes less than package instructions. Combine all ingredients, mixing well.  Add to greased baking dish, freezer bag, whatever your preference to freeze in.  To serve:  Thaw, place in greased baking dish.  Bake at 350 degrees for 35-45 minutes.  Uncover; bake 10-15 more minutes.
    • (UPDATE: Yummy Eats!)


Lunches:
  • Chicken Pockets  (UPDATE- perfect for a quick lunch or dinner!)
  • Taco Cups- I used this recipe but put regular biscuits in muffin cups and added the taco meat to it.  Soooooo much easier!  (UPDATE- the new way tasted just as good and sooooo much easoer to make.)
  • Peanut Butter and Jelly Pockets
  • Grilled Cheese Pockets- essentially, the recipe above, just cheese instead of PB&J, ready to grill...then I added ham to a few.
  • Pepperoni Puffs

Side Dishes:
  • Lime Vegetables
  • Lemon Pepper Vegetables
  • Honey Mustard Peas
  • Garlic Green Beans
  • Garlic Rosemary Mashed Potatoes  (UPDATE:  noone really raved over these)
  • Macaroni and Cheese
  • Sweet Broccoli Pasta Salad (UPDATE- perfect for those summer picnics and cookouts and since all you do is throw the sauce on it, super easy to ALMOST grab and go!)


Breakfast:
  •  Puffins- This is another new one for us... I made them in large muffin pans...next time, I will try small ones, because they took FOREVER to bake, but everyone loved them.  I made them with all different toppings!  
      • (Pancake Muffins) Preheat oven to 350, mix 1 c pancake mix, 2/3 c water, 1/2 c syrup. Mix together, pour in greased muffin pan. Top with banana, blueberries, chocolate chips, pecans, sausage, bacon....etc. Bake for 12-14 minutes and serve.  These were just OK- my kids prefer the Oatmeal Pancakes!                
  • Oatmeal Pancakes  I make these with blueberries or chocolate chips or plain.  My 2 older girls like the blueberries, but the "baby" loves chocolate!

After making the menu, putting new recipes I wanted to try into the 30 Meals In One Day program...off to the store.  I had 2 hours to grocery shop and get it home before the evening appointments began.  I did it!  That was Friday night...

If you aren't using the 30 Meals software, you REALLY should!

Saturday Morning:
I got up and before we headed out in all different directions, I threw a bunch of boneless, skinless chicken breasts in the crockpot, seasoned with garlic pepper and minced onions.  It could cook while I played Taxi Mom.

Back for an hour before picking up from softball....  So, I grabbed a few packs of chicken and trimmed them from any fat I could find- ICK!  Then put together these meals...
      • OMGoodness Chicken
      • Grilled Cilantro Lime Chicken
      • Teriyaki Honey Chicken


Back home again before picking up another daughter from a birthday party.  I had 45 minutes. So, I assembled these meals...
      • Pecan Crusted Chicken
      • Walnut Chicken Salad

After an afternoon of errands, shopping, and an evening appointment, I came home and got the girlies ready and in bed. My chicken I had put in the crockpot was finished now. I cooked for 2 more hours and was able to get these meals done...
      • Chicken and Cheese WW Casserole
      • Chicken Taco Pizza
      • Chicken Pockets
      • Taco Cups
      • Garlic Parmesan Chicken

So, for just 4 hours time....  10 MEALS IN THE FREEZER...On a day when I had no big chunk of time to cook...it seems like this is becoming more the norm for me.

Sunday- I put potatoes in the crockpot to cook so that I could make the Garlic Mashed Potatoes.  That is all I did today.  Our 2 church services followed by a meeting had me exhausted.  Plus when we got home, it was SUNSHINE and 80 degrees- playing in the back yard seemed like a much better use of our time.  :) 

Over the next 2 days amidst work, softball, school, ministry needs, and just LIFE, I fit in the rest of the cooking, but I wanted to share with you how you really CAN freezer cook when you think you have NO TIME to do it! 


Tuesday, April 3, 2012

Shaving Cream

I first saw the recipe and thought, "Will it really work?"  But I figured for around $1.00 what did I have to lose?  With 4 girls in the house, I figure we will be using lots of shaving cream for the next 20 years.  My oldest daughter and I have been using it for three months now, and I JUST had to make a second batch. (Disclaimer:  I do NOT shave my legs every day, so this may not last as long for you.  I will have to use more in the summer months; the trade off to warm weather.) 

We like it and have experienced NO razor burn at all. 

My husband just ran out of shaving cream and grabbed our bottle that sits in the shower.  I was skeptical that it would work for really coarse facial hair and so was he as it is a lot thinner than commercial shaving cream.  After using it, he asked me to make him some in a more "manly" scent.  WIN!


So, do I have you convinced to try it yet?!?!?!

Here's what you need:
1 cup shampoo
1 cup conditioner
1/3 cup lotion
1/3 cup baby oil


Combine all ingredients.  I mix everything in a large measuring cup with a mini whisk.


Pour into desired container. 

Here is what I keep them in- just bottles we have emptied from other product- someday, I will get pretty containers for all of my homemade goodies, but for now these are "FREE" and I kinda like FREE!
I keep the small bottle in the shower and the other is for refills.


Hope you like it!

Monday, March 26, 2012

Freezer PB&J's

When given a choice on what kind of sandwich to pack in their lunch, ALWAYS go for the Peanut Butter and Jelly and why fight that?  But every day making sandwiches- UGH!  Again, I am a To Do List Check it Off Kinda Girl...so...

I decided to try out what I had seen on other freezer cooking boards.  Plus I figured if Smuckers can do it, so can I.

So, out came the peanut butter, jelly, loaf of bread, Pampered Chef Cut 'N Seal, and spreading utensils.

I put peanut butter on both sides of the bread to try to eliminate soggy bread with the jelly. 

Then jelly in the middle- just one side.


Bread together, cut and sealed, ready for the freezer.  :)  A week of sandwiches in just a little more time than doing them 2 at a time!

And all the scraps I froze, so that I could make bread pudding with another day! 

I made some Cheese sandwiches this way, too, so that they can QUICKLY become Grilled Cheese...I will update when we actually have them...seemed brilliant to me!

Monday, March 19, 2012

Cooking Day- Start to Finish

I am going to ATTEMPT to put it all down for you how I do my freezer cooking.  It is important to recognize that everyone will do it a little differently, but maybe you will have a few AHA moments as you read how I do mine.

I attempted to take pictures of the process and did pretty well for the first few recipes and then...I just get on a roll. If you have questions, please post them and I will do my best to answer them or find the answer.

The first thing I do is clear out my refrigerator and my freezer.  I take out EVERYTHING in the refrigerator and wash all the shelves, get rid of any leftovers; you don't have to do that, but it feels better to me to have it clean and organized (but I have been called OCDish before.)  I also go through my freezer and make sure that we have eaten most of the meals that were part of the last Cooking Day.  Whatever I have left, I put together so we can eat those first.

Here is my refrigerator ready before all the groceries enter the house for Cooking Day(s).
Refrigerator ready
Freezer Ready (the 2nd shelf were meals we worked on eating during the time I cooked like a crazy person.)


At this point, I have determined my meals I will be cooking and recipes and grocery lists have been printed.  I normally pick about 20-25 meals that I want to make; often I end up doing a swap with friends, too...more on that some other time. Plus I make breakfast foods, too- the kiddos (and well the parents, too) have gotten quite spoiled now; we rarely eat cereal.  Don't mistake that for breakfast takes a long time now- NOPE- same amount of time in the morning as a bowl of cereal!

NOW LET'S GROCERY SHOP.  For Freezer Cooking I found it pretty much a necessity to go WITHOUT kids; I have to be able to think, plus it is A LOT of groceries. Normally, it is around 50 pounds of chicken, 20 pounds of ground turkey, plus whatever other meat is on the list. Most often, I go very early in the morning (at Sam's Club EARLY) or in the evening after the kids are settled in for the evening.  That's what works best for my wonderful husband and I.

Here are pictures of my 'fridge and pantry ready to cook after grocery shopping.  I put everything away and in its place before I start- some people don't.  Because I work at it for several days, it would seem too chaotic for me to leave things out, but that's just ME!

The tricky part is trying to work out of this refrigerator as the cooking begins.

The pantry- canned goods/non perishables go here until ready to be pulled for the recipes.
All of the groceries are in and I need to organize the recipes I am using.  I absolutely can NOT say enough about the 30 Meals in One Day program!  If you are seriously going to freezer cook, this is something you won't regret. 
I pull out all of the recipes that I have printed for my Cooking Day and sort them according to meat/dish type.  Chicken,Ground turkey, pork, pasta, etc...
Piles of recipes sorted into meat/dish type
After that, I decide which type to tackle first.  Because chicken is the bulk of what we eat, this is where I normally start.  I then divide those meals into how they are prepared.  Will I need it precooked- shredded or cubed- or left uncooked for the recipe?
Then it is time to get the crockpots going (I have three.)  I add chicken breasts to the crockpot, a little liquid and season with garlic pepper and onion.  I turn the crockpot on low and let it cook- most of the time this is what I do the evening that I grocery shop and then let it cook all night long. (If I do it during the day, it cooks on high.) 
In the morning, I removed it from the crockpot, allowed to cool slightly, and shredded, sliced, and cubed the amount of meat that I needed for my recipes.  I poured all of the juices into 1 crockpot and put it into the refrigerator to allow it to cool, so that I could skim the fat off the top and have chicken broth for the recipes.  (I later freezed whatever broth was left for another time!)

My BIG Tupperware bowl filled to the brim with shredded chicken- ready to get the cooking going. (I forgot to take a picture of the cubed chicken and sliced chicken...cooked the same way and cubed or sliced for recipes.)


Now it is time to get down to assembling some recipes. I normally have 2-3 recipes going at once, I do one for the stove top- Bourbon(less) chicken, one for the crockpot-Teriyaki Chicken, and one that just needs assembled- Chicken Tortillas.  That way while I am assembling one, the other 2 are cooking. 
For assembly dishes- ones that will go from freezer to oven, I use disposable foil pans. 
Things I have to reheat or put in the crockpot, I tend to use Freezer bags for those- they lay flat in the freezer very nicely to freeze and then are easy to stack.

A HINT:
When filling up freezer ziplocs, fold the top over, and this will avoid dripping juices all down the bag and getting the "seal" all yucky...sorry, I have a toddler...here's a picture of what I mean.  Plus I put it into a big glass measuring cup so that I don't drop it as I fill it....wonder how I learned that trick. ;)  Cleaning up a bag of chicken noodle soup makes me want to cry....

My chicken recipes this time were:
Chicken Parmesan
Chicken Fajitas
Chicken Cordon Bleu Bake
Tortilla Chicken
Teriyaki Chicken
Chicken Squares
Chicken Chili

And a few pictures...From Top to bottom:  Bourbon(less) Chicken, the makings of Tortilla Chicken- the recipe actually calls for it to be layered like a lasagna- seems like too much work to me, so I mix up the filling and roll it like burritos, Chicken Squares- 2 crescent rolls pinched together and filled with chicken mixture, Baked Chicken Nuggets ready to be frozen, and the chicken for Chicken Parm browned.  YUMMINESS!


When all of that chicken was done, I had 18 meals for my freezer, because some of the recipes I made double batches. It doesn't take much longer to double a recipe.  YAY!  Cooking done for over 2 weeks!

All of the chicken took me 2 evenings plus the night that it cooked, but does that really count, because I slept through it all? 

Then comes the ground meat...crockpot again- YES!  I cook my ground meat in the crockpot, too, and I put it in during the day, because I cook it on high and watch it throughout the day.  While I am finishing up the chicken recipes, I throw it in the crockpot with some garlic pepper and minced onions, add some chicken broth or water to it- maybe a half a cup.  I can cook 5 to 7.5 pounds of ground turkey in my crockpot at a time.  That was all the cooked ground turkey I needed this time.
Credit goes to Once a Month Mom for the amazing tip on browning meat in a crockpot, a serious AHA moment for me!


I use Jennie-O's ground turkey, but I am contemplating trying ground chicken.


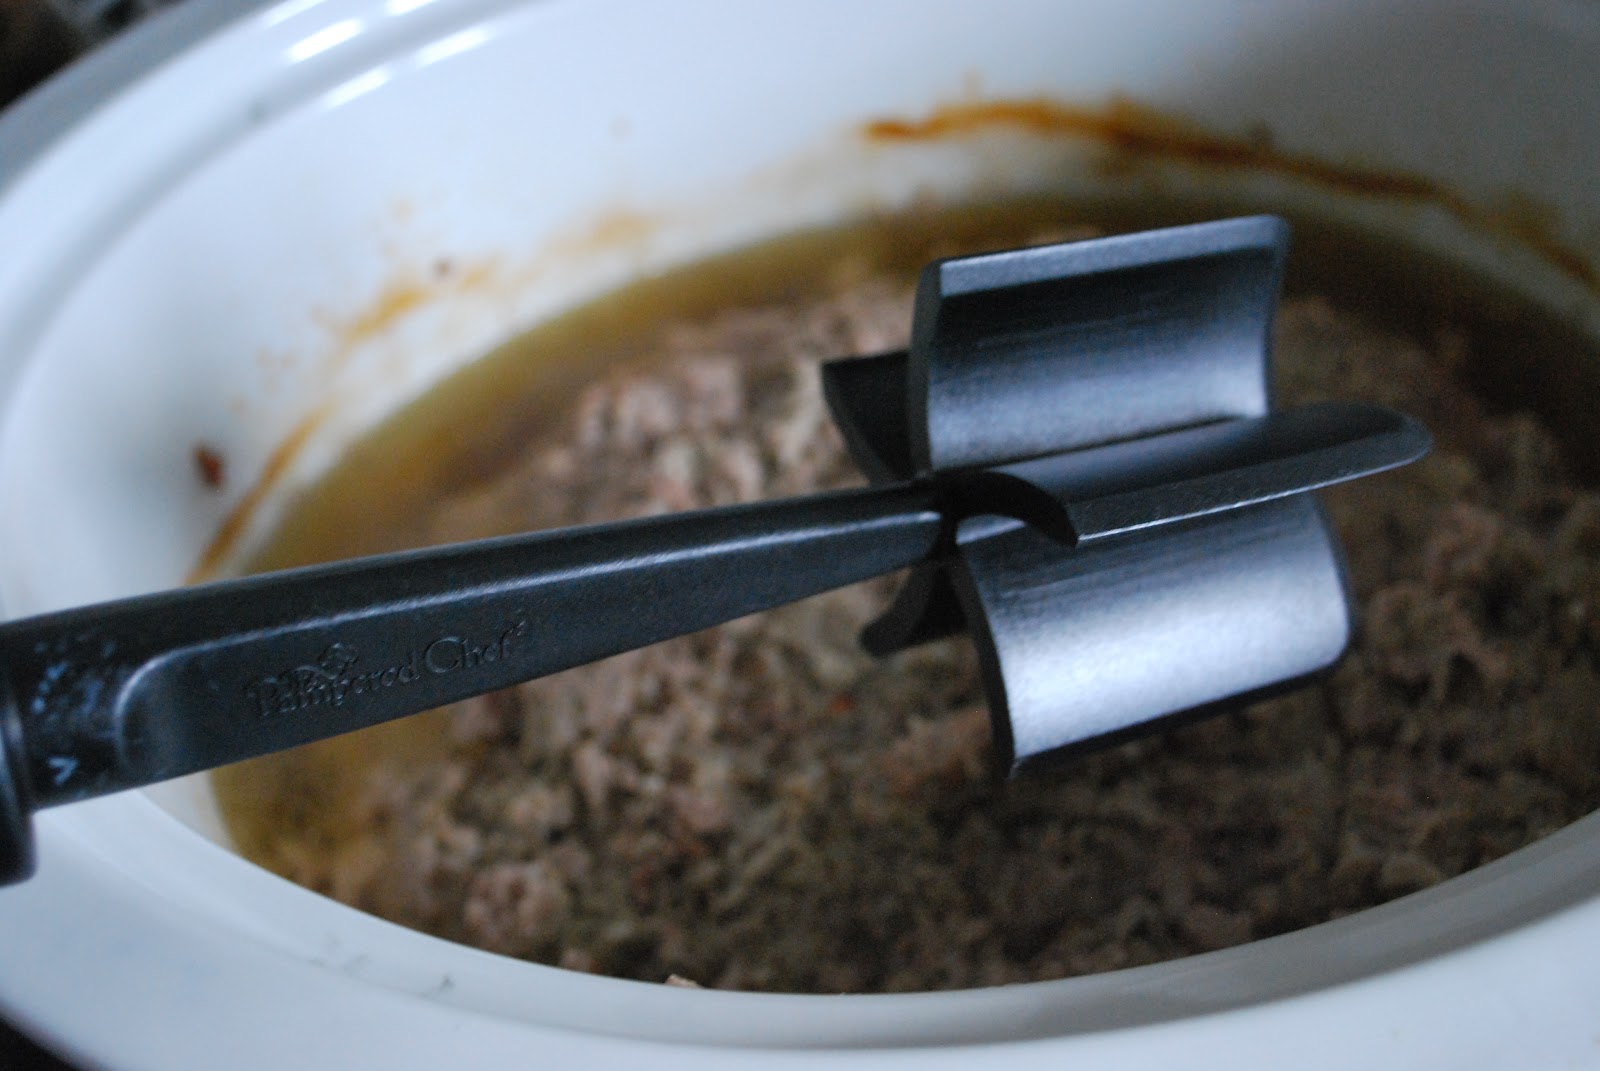
As it cooks, it kind of forms into a big blob- kinda gross really- and the first time I did I thought, "this is a big mistake."  Enter the Pampered Chef tool- this thing is awesome.  It really breaks up the meat nicely!  When you are all finished browned meat with no mess and smelly kitchen, and you can keep going with your cooking as your meat cooks.


My recipes for this meat:
Taco Meat
Chili
Taco Cups
Savory Vegetable Beef Soup
I also made meatballs that I can take out of the freezer and throw in sauce or soups and be ready to go.  These recipes took me an evening after the kids went to bed to wrap up.  Another week and a half done!

The other recipes that I did were:
Ham and Cheese Casseroles
BBQ Pork Roast
Almost Ravioli
Easy Pizza Pasta
Pasta and Cheese Casserole
Pasta sauce
Oatmeal Pancakes   I made these with blueberries this time, but we LOVE them with chocolate chips, too! 
           (here is a tutorial on how I freeze pancakes)
French Toast Sticks
Bacon, Egg, and Cheese Wraps  (I used Canadian bacon cut into small pieces)
Egg and Cheese Muffins
Freezer Hash Browns
Low Fat Corn Muffins
Spinach Quiche
Candied Carrots

I told you I didn't keep up with pictures!  :)

All of that is DONE and I now have a freezer FULL of breakfasts and dinners that should last me about 6 weeks!  This makes me feel like a Proverbs 31 girl, pretty sure that my family might praise me from the streets a few times this month.  Happy Cooking!

And my Freezer at the Start:

Although there are times during the process, I think WHY????  Like when I feel like I am doing the 4,532nd load of dishes...


And when I am feeling EXACTLY like she looks....I wonder if it is worth it?????

And my Freezer at the END!!!!  THEN it is totally worth it.  I <3 My Freezer Cooking!


Saturday, February 25, 2012

Card Binder

Ok, so Michelle and I have tons of cards we have made and we always like to save one of each card for future reference. Whether we make them together or separate. I was trying to figure out an easy way to display them for quick reference and I came up with this. I decided to use one of my 3 ring binders with sheet protectors. I just mounted the cards on a piece of cardstock, slid them in sheet protectors and there you have it. A easy grab solution to sorting through the piles or boxes. Later I am planning on adding the recipes for each card so I have those on hand as well.
If you have any ideas for a better way to store your cards, I am always open for suggestions. Thanks for reading.

Hello Kitty

I just made a quick birthday card tonight to add to my stock pile. I like having cards on had when the occasion arises. This card I made using left over cutouts from a previous project. I just didn't have the heart to throw the extra ones away. I usually end up giving them to my daughter for her scrapbooking pile. LOL I have to say she is getting quite a collection. You will see more about that as I continue organizing my scrapbooking room.


Card recipe

Hello Kitty cut @ 3"
Card 4 1/2 x 6
Rub Ons for heart, flowers and Happy Birthday
Large Brad for extra embellishment

Foaming Handsoap for 5 CENTS a bottle

I really like foaming handsoap.  My girls use 2 squirts of whatever kind of soap I put at the sink, so if I use regular liquid soap, we go through A LOT of soap.  I have tried to get the perfect foaming soap recipe and FINALLY found it, so here it is...

1 Tbl. Dawn Ultra-Concentrated dish soap
Water
An empty foaming handsoap bottle (I used an old Bath & BodyWorks one that I received as a gift.)


Add a little warm water in the botom of the dispenser, add the dish soap, fill to ALMOST the top, leaving a little room to gently combine after putting the lid back on.
THAT'S it; the perfect foaming handsoap. WOW!

So, because I am a little bit nerdy (maybe a lot frugal), I wanted to do the math and see how much this was going to save me.  I bought the dish soap at WalMart's regular price- no coupons.  (I KNOW, all you couponers, this is something I should be getting for free, but I just don't get the whole couponing thing yet- Never say Never, but right now, it's not worth it for me!)  I paid just over $2.00 for the bottle.
This ONE bottle will refill my soap dispenser about 47 times, making each time I refill it a whole whopping 5 CENTS (on the high side) to refill!!!!  The Aldi brand of foaming soap I normally use is $1.57 a bottle!!!!  I just made $70.  Now, just think if I actually bought the B&BW soaps normally- WOAH!  Major Savings! 

Try it out.  Tell us what you think!