Saturday, February 25, 2012

Card Binder

Ok, so Michelle and I have tons of cards we have made and we always like to save one of each card for future reference. Whether we make them together or separate. I was trying to figure out an easy way to display them for quick reference and I came up with this. I decided to use one of my 3 ring binders with sheet protectors. I just mounted the cards on a piece of cardstock, slid them in sheet protectors and there you have it. A easy grab solution to sorting through the piles or boxes. Later I am planning on adding the recipes for each card so I have those on hand as well.
If you have any ideas for a better way to store your cards, I am always open for suggestions. Thanks for reading.

Hello Kitty

I just made a quick birthday card tonight to add to my stock pile. I like having cards on had when the occasion arises. This card I made using left over cutouts from a previous project. I just didn't have the heart to throw the extra ones away. I usually end up giving them to my daughter for her scrapbooking pile. LOL I have to say she is getting quite a collection. You will see more about that as I continue organizing my scrapbooking room.


Card recipe

Hello Kitty cut @ 3"
Card 4 1/2 x 6
Rub Ons for heart, flowers and Happy Birthday
Large Brad for extra embellishment

Foaming Handsoap for 5 CENTS a bottle

I really like foaming handsoap.  My girls use 2 squirts of whatever kind of soap I put at the sink, so if I use regular liquid soap, we go through A LOT of soap.  I have tried to get the perfect foaming soap recipe and FINALLY found it, so here it is...

1 Tbl. Dawn Ultra-Concentrated dish soap
Water
An empty foaming handsoap bottle (I used an old Bath & BodyWorks one that I received as a gift.)


Add a little warm water in the botom of the dispenser, add the dish soap, fill to ALMOST the top, leaving a little room to gently combine after putting the lid back on.
THAT'S it; the perfect foaming handsoap. WOW!

So, because I am a little bit nerdy (maybe a lot frugal), I wanted to do the math and see how much this was going to save me.  I bought the dish soap at WalMart's regular price- no coupons.  (I KNOW, all you couponers, this is something I should be getting for free, but I just don't get the whole couponing thing yet- Never say Never, but right now, it's not worth it for me!)  I paid just over $2.00 for the bottle.
This ONE bottle will refill my soap dispenser about 47 times, making each time I refill it a whole whopping 5 CENTS (on the high side) to refill!!!!  The Aldi brand of foaming soap I normally use is $1.57 a bottle!!!!  I just made $70.  Now, just think if I actually bought the B&BW soaps normally- WOAH!  Major Savings! 

Try it out.  Tell us what you think!

Thursday, February 23, 2012

Homemade Fabric Softener


I originally found a recipe online and began to use it, but I still found that my clothes were full of static.  The adjustments I made have helped (more vinegar.)  And NOOOOO my clothes do NOT smell like vinegar. They don't really smell like anything.  I love how much money I am saving by making my own cleaning products.
3 simple ingredients
One of the secrets to less static is not overdrying your clothes- sometimes tough to do.

I love to add baking soda to my towels (I just dump about 1/4 cup on top of my towels as I put them in the wash.)  My towels are incredibly SOFT when I do this!

Here's what you need:
6 cups water
6 cups white vinegar
2 cups hair conditioner (I like fresh breeze, rainfall, etc...scents,  but you can use whatever you like)

Mix all together with a whisk and pour into a large container.


Use in your Downy ball and put in the washer. 


Some people wet an old rag with it, squeezing out the excess, and put it in the dryer with their wet laundry.  (I haven't tried it this way, yet.)

Costs around $2 to make almost a gallon of fabric softener. You use it just like regular fabric softener!) 


Individual Pineapple Upside Down Cakes

When I saw these on Pinterest (I know, SHOCKER!) I could not wait to try them.  This is my dad's favorite dessert.  The recipe I found was a start from scratch cake....ummmmm....NOOOOOO!  Enter cake mix, please!


Ingredients
1 Yellow Cake Mix
Pineapple Rings
Marashino Cherries
Jumbo Muffin Pan

1/4 cup butter
1/2 cup brown sugar

Prepare cake mix according to package directions.  (I did deviate from the recipe here and the results were FANTASTIC!  I substituted Fage Fat Free Greek Yogurt for ALL of the oil, I replaced the water with pineapple juice, and used egg whites.  And noone guessed that I cut the fat and cholesterol- shhhh! don't tell them either.)  Don't bake the cake yet.  :)

Preheat oven to 350 degrees.  Spray bottom of muffin pans with cooking spray.
Melt butter and brown sugar in a small saucepan and cook for 1 minute after melted.

Place pineapple rings in bottom of muffin pan, place cherry in the center of each.  Divide the brown sugar mixture evenly between the sections and then top with prepared cake mix- 3/4 full.  (It should make 12 large muffin sized cakes.)

Bake for 25 minutes or until golden brown.

Run knife around outside to make sure they won't stick to the pan when you flip them. I flipped mine onto a wire rack with a large cookie sheet underneath and allowed to cool. I LOVE how these turned out and they will  be on the frequent dessert list.

I think these would be a HUGE hit at the next Bake Sale. 
Try these; you'll like them!

(Note:  You could make these in regular muffin tins, but would need to use pineapple tidbits instead. Adjust baking time to 20 minutes.)

This will also be posted on The Serendipity Bistro.  Check out all kinds of great recipes there!!!!


Friday, February 17, 2012

Liquid Soap Made from Bar Soap

My lovely daughters kept leaving me a ooooeey goooey gross mess when they were done with their baths and showers.  It completely grosses me out to pick up slime off the bathtub floor, so I decided to try and find a soap for them...enter Pinterest (of course) and I found several recipes for homemade liquid soap.  Now, I fill up an old shampoo bottle and they can squirt away onto their bath sponges and scrub away- we're all a litle happier over this.
One bar of soap, water, and a little glycerin makes a GALLON of liquid soap.  They were using up at least one bar of soap a week before; this lasts us well over a month.  My husband and I still use the bar soap or bodywash, but this has been a great thing for our girls.

All you need plus water
2 cups soap, grated really fine
20 cups water
2 Tbl. glycerin

I used one bar of Dial bath soap- it was a little more than 2 cups. The glycerin I bought at Hobby Lobby with a 40% off coupon in the soap making section of the store.


Grated Soap makes me smile!  (Weird- huh?)

Heat the water on medium heat as you grate the soap. Add the soap and stir gently until the soap is completely melted.  Add the glycerin. At this point, I pour mine into pitchers and allow to cool; this makes it pouring into smaller containers much easier once it is cool.

Once the soap is cool, (I let mine just get lukewarm) pour into containers that you can use for your soap.

NOTE:  The texture is NOT the same as body wash or liquid soap and I haven't tried it in a soap pump yet, but I am over that with the savings I have seen! 

Tell us what you think after you try it!

Thursday, February 16, 2012

Tub and Shower Cleaner that AMAZES

These 2 ingredients will clean your shower like never before- it really is AMAZING!
ONLY 2 Ingredients Needed!!!!!

What you need:
1/2 cup Dawn Dish soap
1/2 cup Vinegar

Yes!!! REALLY!!! That's all you need.

You need equal parts of each ingredient. (I made 8 ounces, because that worked best in the bottle I reused.)  Warm the vinegar in the microwave being VERY CAREFUL not to inhale the vinegar when you bring it out of the microwave.  If you do this, be warned....I TOLD YOU SO! 
The solution is a milky blue color.

Pour the Dawn Dish soap into the vinegar and gently mix together. Pour into spray bottle.

Now, if you are like me, you will head straight to the shower and try it out. You won't need as much as your old shower cleaner. It is soapy, obviously, so you have to rinse it.  Really stubborn soap scum build up?  Let is soak for awhile or overnight.

I clean my shower every day- really, it's true- but since finding this, I sometimes skip a day (gasp!) and there's no build up of nasty!  YAY!

Now that my shower has NO BUILDUP at all; I cut the Dawn Dish soap in half, so this is how I make it now for the size bottle I have...
1 cup Vinegar
1/2 cup Dawn Dish Soap

Let me know what you think!

Birthday Party

It's finally over... Hailey's 8th Birthday Party Sleepover, and let me just say I am tired! Who knew 8 little girls could wear a person out so much? Well, in all honesty Michelle and I know that very well but have decided that the smiles that appear on our children's faces make it worth it! Now Michelle already showed you the invitations but I'm just going to attach them again to complete this post.
I love how they turned out! (Good job, Michelle)
After invitations were complete off to Pinterest http://pinterest.com/ we went to find ideas for decorations, cakes, and games. Let me just say I love love love Pinterest! With the sleepover theme it was easy to decide on decorations. I set a table to make it look like a bed with pillows and blankets. Then on top of blankets I scattered all kinds of candy. The girls thought they had entered a candy store; they even played a real life Candyland game. I know the parents were thanking me the next day for all the sugar :) shhh.
I decided to make Hailey a special birthday shirt to wear to school. I bought just plain shirts to decorate with fabric I cut out with my Cricut. This turned out to be a little more challenging that I had thought, but this was my first attempt at cutting fabric. After some trial and error, I ended up with a great shirt.
First, I did some practice cuts on scrap paper to make sure my sizes weren't off. I thought I had decided on the design I wanted but you will see that as I work on projects they tend to change into something totally different most of the time.
Before you cut your fabric you need to purchase an item called Heat n Bond. You will Iron this onto your fabric giving it a more stickable texture to help it adhere to the Cricut mat. make sure you use a clean sticky mat for fabric cuts, and a new Cricut blade. If you mark your blade with a F for fabric it will help you remember which is which. After fabric is cut just iron it on. Then for some extra touches I used stickles tracing around edges.
For Hailey's treat for class she wanted to take homemade Melting Snowman cookies. These are so easy. I was short on time so I took the easy way out with pre packaged sugar cookies.....come on it was already 2:15am I was tired.
Melting Snowman Cookies
Cut into 1/2 slices and bake according to package.
(They don't have to be perfectly round you want them to look a little messy)
Next I used a mixture of Cookie Icing and Whipped Vanilla Icing and mixed it together then microwaved it for about 8 sec to help drizzle on cookies. You want icing to run off the sides and look sloppy.
For the head of the snowman I used large marshmallows and microwaved them for about 6 secs then took them out and cut in half and placed sticky side on cookie . Press down a little to make it look smushed.
Finally decorate faces and body with different color icing.
Now the Cake... Hailey choose the one she wanted on Pinterest. This was my first try at piping a cake and I think it turned out pretty good. The cake had four layers top one yellow, two middle ones just a hint of cherry and the bottom layer was cherry. For the cherry flavor and color I used koolaid. for the icing I made a homemade buttercream icing for sides and vanilla icing for top. I have to say this was one of my best tasting cakes ever. It was a big hit!
Breakfast the next morning I made pancakes and used food coloring in the batter and the girls thought it was the coolest thing ever. Overall, I think that the party was a great success.

Wednesday, February 15, 2012

Super Princess Valentine's

For Valentine's day my boys wanted super hero valentines. This is due in part to the fact that my husband still dreams of one day becoming a superhero. When he was a kid he would dress up in yellow pants, shirt and cape and he became Yellow Man... he had the power of yellow. I'm still not sure what that power is and Norm won't tell me what that means? LOL My boys now are in love with all superheros. At any given moment, you will see my youngest son Connor in yet another costume. Hailey, on the other hand, is a mixture of both wanna be superhero and princess.
Hailey choose butterflies for her Valentines.
Yet again to get ideas for almost anything I head to Pinterst. Hailey's valentine was made with Cake Basics cricut cartridge, for the butterfly outline cut at 5 1/2 inches and George Basic Shapes for the circle and heart. I used my Gypsy to cut out everything so I didn't have to punch out the hearts or circles. I just set images overtop of each other to make cuts. After the butterflies were cut out I folded them in half without creasing them and made two slits to slip the sucker stick through. Glue your circles on and write your message and you're done.


Both boys wanted the same valentine so this made it easier on me. For the cape and mask I used my Superman Cricut cartridge. Then on both valentines I put the boys initials on the back of the cape. For the hole in the cape, you could use a hole punch. If you have the Gypsy like me, I just overlapped my cuts to make a circle at the top of the cap. That's it pretty simple.

Monday, February 13, 2012

A Popping Valentines Day

Our Valentines for this year. Each of my girls, ages 3, 9, and 11 picked out a color scheme that they liked and my 9 year old "designer" went to work with my Digital Scrapbooking Software.  This one was my favorite!


We made big batches of Koolaid Popcorn and filled little treat bags with that yummy treat, attached the valentine to the top, and super cute valentines were DONE.

Here's the recipe for that:
Kool-Aid Popcorn

Popcorn (I popped 1 cup of kernels in my hot air popper)
1 cup corn syrup
2 cups sugar
1/2 cup butter

2 packages kool-aid
1 tsp. baking soda

Pop the popcorn.  Pour into a large roaster pan.  Stir together the kool-aid and baking soda.
Melt butter, corn syrup, and sugar together.  Boil rapidly, stirring continuously for 3 minutes. Remove from heat and add the kool-aid/baking soda mixture. (It will bubble up.)
Pour this mixture over the top of the popcorn in the roaster. Stir until popcorn is coated.

Bake in oven for 10 minutes. Stir. Bake for another 10 minutes. Stir and bake for an additional 10 minutes.  Immediately pour it out into a large bowl and allow to cool, breaking it into pieces once cool.

ENJOY!


Our middle little lady wanted an "Awesome" valentine's box (of which I am not good at.)  So, to Pinterest we went and she found a robot one she liked. I think it turned out pretty great- what say you?


Then the "baby" wanted a great Valentine box, too, so we came up with this and she was super excited about hers.


So, Happy Valentines Day!  Do something nice for your sweeties!

Sunday, February 12, 2012

German Chocolate Truffles

Be ready to be a HERO when you make these...seriously!!!!  The staff at my girls' school go crazy when I make truffles. 

Ingredients
1 Box German Chocolate Cake Mix
1 Container German Chocolate Frosting (it's the caramel with coconut in it)
White Chocolate for dipping

Directions
Bake cake according to package directions and allow to cool.
Crumble into a large mixing bowl; add frosting to the crumbled cake mixture. Mix well- I find it is easier (although messy) to mix with my hands. Cool in refrigerator.
Scoop out the cake mix by the heaping teaspoon and roll; place in refrigerator or freezer to get them firm.
Melt chocolate. Take the rolled cakes out a few at a time and dip in the chocolate and allow to cool completely.

This recipe can also be found at The Serendipity Bistro.  Check out that blog for more great recipes from my good friend, Nikki and I.

Saturday, February 11, 2012

Homemade Laundry Detergent CLEANS UP!


Right before our youngest was born (three years ago), I started hearing talk about making my own laundry detergent.  I didn't think much of it really. It wasn't until about a year ago, I began to give it considerable thought. I was paying $17 a MONTH for detergent for our family of 5...eeek...I wanted to change that, but I really liked the eco-friendly version I was using.  A good friend of mine started making hers; I decided to give it a go.  All of the ingredients needed cost me around $10.  I figured I wasn't out much if I hated it.

We have been using it for about 6 months and I just bought the ingredients for only the second time- WOW!  That is great savings.

It takes me MAYBE 15 minutes to make.

Recipes abound all over the Internet. I adapted mine from one I found on Pinterest.

So, now for the recipe...complete with pictures for you.

Homemade Laundry Detergent Ingredients:
1/2 cup borax
1/2 cup washing soda
1/3 bar Fels Naphta soap- finely grated
Water


Heat 6 cups water on the stove as you grate the bar soap.  Heat to boiling, add the soap and reduce heat to medium.  Stir until all the soap is melted.  Don't let the soap boil.


Add the washing soda and the borax and stir until completely dissolved.  Stir for a few minutes longer until it thickens slightly (kind of like cooked pudding before it is cooked.)  Remove from heat.


Add 4 cups hot water to the soap mixture and stir.  (You can add essential oil here if you like- sometimes I do, sometimes I don't.)  Add 6 more cups water. Allow to cool.


Most recipes, tell you to let it sit overnight; I do not let mine sit...I am a get-it-done-check-it-off-the-list kind of girl...so I let it cool enough to pour it into my old detergent containers.  Leave room at the top to give it a good shake when you use it.  (Someday, I might get pretty containers, but for now...these are FREE!)


Use 1/4 cup detergent per load.  The detergent I make is more concentrated than a lot of the other recipes you will find- why store water?  It is necessary to shake this up before using as it will settle into "layers."  A good shake and you are all set, though!

DONE. I can NOT imagine buying detergent now.  Let me know what you think after you try it.


Thursday, February 9, 2012

Rosemary Garlic Baked Chicken

This is a favorite recipe of our entire family. I found it several years ago on a Weight Watchers board and have since adapted it to go in the freezer. So easy to make, but tastes amazing! We love this served with mashed potatoes and Candied Carrots.

Ingredients
1 lb. boneless skinless chicken breast
1/2 tsp. salt
1/4 tsp. pepper
1 tsp. olive oil
2 tsp. lemon juice
4 tsp. rosemary garlic seasoning
2 tsp. parsley
1/4 cup canned chicken broth

Directions
Coat roasting pan with cooking spray. Season both sides of chicken with salt and pepper. Transfer chicken to prepared pan. Drizzle with olive oil; sprinkle with lemon juice, rosemary garlic, and parsley. Pour chicken broth around the chicken breasts.

This recipe can be frozen at this point or baked at 400 degrees for 30 to 35 minutes until chicken is cooked through.
To serve from frozen, thaw and bake as directed.

This recipe can also be found at The Serendipity Bistro.  Go check out this food blog- YUMMINESS!

A Weekend of Creating

Once a year (in the middle of winter), Shellie and I leave our 3 children each with our hubbies and they let us escape to Scrapbook the weekend away.   This year, I digi-scrapped and she organized pictures (and fought with technology and WON!) We saved the last day (Sunday) for card making and here is what we made.  Enjoy.  These were all ideas we snagged from Pinterest and made our "own." 

5 cards in an afternoon
When we set out to make cards, we don't just make ONE- Why? Most of the work is in the designing and picking out the paper.  Once you figure out the "recipe", it's all "assembly" after that.  We normally make 6-8 of each card and then we split them to each take home. Shellie and I don't send cards to the same people, so no one ever knows we both have the same cards.

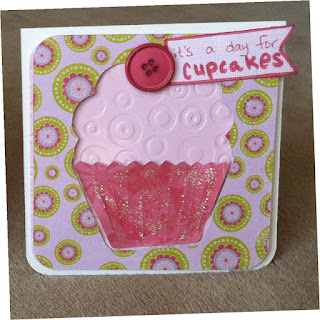
Here's a closeup of the cupcake card:

We added Stickles to the cupcake liner for some extra glitter- it is hard to see how pretty it is here

Shellie used the cupcake card and this Princess card for her daughter's upcoming birthday party (a blog post soon to come- wait until you see the cake her princess picked out)


We like to add something to the inside- it feels more complete, so here is what Shellie did to make these 2 cards PERFECT for her daughter's invites.


Here's the thing...when we make cards, we have a hard time actually parting with them...so I had to talk her through actually sending these for the invites; she did and there are going to be some happy little girls at her daughter's party.  (look for an upcoming blog post all about the party.)

Root Beer BBQ

Here is a new recipe I tried for our No Football Super Bowl Party...YES!  We actually did NOT watch the Super Bowl, but I did make some yummy food.  Hope your family enjoys it. I made extra for my freezer and a Freezer Swap I am in.  Delicious! (Sorry no pictures- I have to get used to taking pictures of things as I do them.)

Go Buy:
3 pound pork sirloin roast
1 cup root beer
1/2 tsp. salt
1/2 tsp. pepper
2 cups onion, wedged
2 Tbl. garlic, minced

24 ounces root beer
12 ounce bottle chili sauce

Let's Cook:
Trim any visible fat from roast. Cut it into 4 pieces and place in slow cooker. Pour one cup root beer over the roast and sprinkle with the salt and pepper. Add garlic and onions.  Cover and cook on low for 8 to 10 hours (or on high for 4-5.)  I put mine on right before bed and let it cook all night.  (Warning: It fills the house with AMAZING smells.)

In a medium saucepan, combine the 24 ounces of root beer with the chili sauce.  Bring to a boil. Reduce heat.  Boil gently; uncovered; stirring occasionally, about 30 minutes or until sauce is reduced to 2 cups.  (I actually just combined these 2 ingredients and added them after I shredded the pork and then cooked for a few more hours, but I am just kinda lazy like that.) 

Remove roast and onions from the slow cooker and allow to cool enough to handle. Discard broth.  Shred meat.  Pour root beer sauce over all. Stir to coat. Allow to cool completely and place in freezer bags or containers.

FREEZE for later. (Of course, you may want to eat some now, too and then freeze the rest.)

To serve:
Thaw and heat.  You can top sandwich buns with lettuce and tomato.

Happy Cooking.

10 servings.
Recipe Credit- 30 Meals in One Day Software

This recipe can also be found at The Serendipity Bistro
Check out all the other great recipes there. 

Monday, February 6, 2012

Freezer Cooking Crazy?

When people hear that I love Freezer Cooking (Once a Month Cooking), the responses that I get are pretty much the same:
I hate to cook let alone cook for a whole day...
That seems like a lot of work...
I don't have time to cook that much- if I were a stay at home Mom I could...
It costs too much money...
Those are the most common responses and we'll CHAT about those each for a minute.

And then there are the folks that lock in and shout TELL ME MORE that make me excited that I found freezer cooking.

My Freezer after a January Cooking Session.  This makes me feel like a Proverbs 31 Girl!
First off, I have been freezer cooking for about 12 years. I used to cook ONE day a month and that was it.  Then baby 1 and 2 came within 6 months of each other (I <3 Adoption!) and life got very hectic.  I could NOT figure out how to spend an entire day cooking with a 2 year old and an infant- can you say major meltdown?!?  Then enter the 3rd baby several years later (SURPRISE!) and it clicked...do it in the evening.
So for about 3 and a half years I have learned to stock my freezer in smaller amounts of time.  Some days, I just make a triple batch of whatever I am cooking- taco meat, chili, chicken for fajitas, etc...  Lately, I find myself being more ambitious and cooking 30-40 meals in three to four days.  I am loving my freezer and the stress free meals it brings us. Hope this may help you.

The reason WHY is simple:  Mostly, because my family likes to eat every day. I know- SHOCKING!

The reasons why people are "afraid" of freezer cooking:

I Don't Like to Cook
The secret is I don't really enjoy cooking...guess that is not a secret anymore... I don't enjoy the process of cooking.  It always seems like a chore and when  you have to do it EVERY DAY, it feels like something that just never "gets done."  See, I like to feel "accomplished", and so when I spend an entire day in the kitchen (or a few evenings, depending on our schedule), I feel like I have something to show for my work.  It's perfect if you don't like to cook, but your family still likes to eat.

That Seems Like ALOT of Work
Well, YES, it is, but so is cooking starting from scratch every single day.   You see 5 pounds of meat = 5 meals, but still one pan used. If I brown meat every night, I have to wash that same pan 5 times- YUCK!  Plus, it's less dishes to clean up, because you are making more than 1 meal at a time...why brown 1 pound of meat when you can brown 5 in the same pan?  I am all about keeping it simple if I can.

I Don't Have Time to Cook That Much
I don't really have time to cook either.  With 3 girls, a hubby in school full time, working 3 days a week, helping my husband in children's ministry, we are very busy!!!!  What makes Freezer Cooking such a WIN is that when it is all done, all I have to do is pull it out of the freezer, put in the oven,crock pot, or reheat in the microwave, throw a couple sides together and dinner is SERVED! Since I am not having to be real "hands on" with dinner, other things can get done at the same time. (Normally it is homework at the dining room table.)

It's Too Expensive to Cook all at Once
The upfront cost seems like a lot at once- that is completely true. So, start with 2 weeks and see how you like it. Guaranteed, you will find yourself going through the drive thru or grabbing a pizza on the run a whole lot less.  And in case you haven't discovered, fast food is not cheap!  (When we go to Wendy's with our family of 5, it costs us around $20 and that is eating of the VALUE(???) Menu.  That same $20 will stretch to make 2  to 3 freezer meals! 

So...Are You Ready To Give Freezer Cooking  a Go?

The next time I freezer cook, I will take photos throughout the process to share with you.
By far, may favorite way to Freezer Cook is to do a Meal Swap. Get 3 or 4 friends and pick meals (4-5 is a nice number of meals) that you all want to have and then cook your 4 or 5 meals. Then SWAP with each other.  Make sense? When you are all finished and swapped, you have up to 20 meals and you only made a few different meals, just larger "batches."  Some swaps I know actually cook together.  That doesn't seem to work out for me, because we are all so busy.  This allows us to cook when it is convenient for each of us. (For me, it is after all 3 of my kiddos are in bed.  So I end up cooking 3 nights from 8:30 to Midnight or later.) 

Let me clue you in on the BEST thing I ever did for my freezer cooking...this program called Thirty Meals in One Day. 
Software - with Dinner is Ready Recipes
This program has tons of recipes, plus you can add all of your favorites.  It figures out your grocery list, prints recipe cards, adjusts recipes if you want to make more than one at a time.  Then when you are all finished, it will print labels for you to stick on your food WITH cooking instructions once you pull it out of your freezer. GENIUS, I tell you.  (And they don't pay me...I just LOVE this program.)


Maybe this will help you, too.

Thanks for the CHAT today.

Saturday, February 4, 2012

Here We Go

Here we go...Shellie and I have talked about starting a blog for over a year now and finally are ready to jump in.  We both love to create- Shellie is a traditional paper Scrapbooker, I am All Digital now and haven't looked back.  I do still get my paper fix making cards and it is the BEST when I get to craft with friends...


Here we are at a weekend Scrapbooking event- we <3 us some Scrappin' Time!


So what will the blog be about?
C- Creative Things (Scrapbooking, Card making, Projects)
H- Homemade Things (I <3 making my own cleaners and detergents, so those goodies will be here.)
A- Appetizing Things (I cook because my family likes to eat...there I said it!  Freezer Cooking Rocks!)
T- Tender Things (The things that touch our hearts- the Lord, ministry, our husbands, kids, and friends)

Hope that you like what you see and follow us in this journey.  Comment lots; we like that!